
Design Ideas
Small Bathroom Renovation Ideas: Making 4m2 Feel Like 6m2
By Remodler · · 13 min read
Small bathrooms are harder to design than large ones. Every decision compounds, and there's no spare space to absorb a mistake. Put the shower screen 40mm too far into the room and suddenly the vanity door won't open past 60 degrees.
This guide covers what actually works in the 4m2 to 8m2 rooms our small bathroom renovations team rebuilds constantly across the Hills District and Western Sydney. It's written from site experience, not a mood board: real mm dimensions, real waterproofing requirements under AS 3740, and real Sydney pricing.
We'll walk through measuring and planning, the layout options that fit a genuinely small footprint, the fixture and material choices that create real and perceived space, and the costs and timeline you should expect before you sign a contract.
Measuring and planning a 4-8m2 bathroom properly
Before any design idea gets discussed, get the real numbers. We measure internal wall-to-wall dimensions at floor level and at 1200mm height (walls are rarely square), ceiling height, window head and sill height, door swing direction, and - most importantly - the exact location of the WC waste, the floor waste and the water supply points under the slab or floor.
That last point matters more than anything aesthetic. In a slab-on-ground home, moving the toilet means cutting the slab, re-running a 100mm waste line to the correct fall (minimum 1:60 for a 100mm pipe over the run to the stack) and re-pouring - typically $2,500-$4,500 extra before you've bought a single tile. In a small bathroom, that money is almost always better spent on better finishes with the fixtures kept close to their existing waste points.
We also check the wall framing: standard 70mm or 90mm stud walls determine whether you can recess a niche or cabinet, and whether a wall is load-bearing (which rules out easily moving a doorway). A small bathroom with a hip roof or reduced ceiling height near an external wall also limits where a taller shower screen or cavity slider head can sit.
Layout options that actually fit a small footprint
There are really three workable layouts in a room under 8m2, and the right one depends on your door and window position more than your taste.
| Element | Tight minimum | Comfortable |
|---|---|---|
| Shower footprint | 900 x 900 | 1200 x 900 |
| Clear space in front of WC | 600 | 700-800 |
| Clear space in front of vanity | 700 | 900 |
| Door swing / cavity slider opening | 700 | 820 |
| Vanity width (single basin) | 600 | 900-1050 |
Swipe the table to see all columns.
The 3-wall galley layout (4.0-5.5m2)
WC and vanity along one wall, shower across the far end. This is the most common Hills District ensuite layout because it keeps every fixture on an external wall run and needs the shortest waste pipe runs. A workable minimum: 1500mm shower width x 900mm depth, 900mm vanity, 700mm clearance in front of the WC (NCC and comfortable use both want at least 600mm clear in front of the pan, ideally 700mm).
The corner shower layout (5.5-7m2)
Shower tucked into a corner as a 900x900mm or 1000x1000mm hobless square, vanity and WC on the two open walls. Works well where a window sits centred on one wall and you don't want to build a shower across it.
The full wall-to-wall shower (7-8m2 and up)
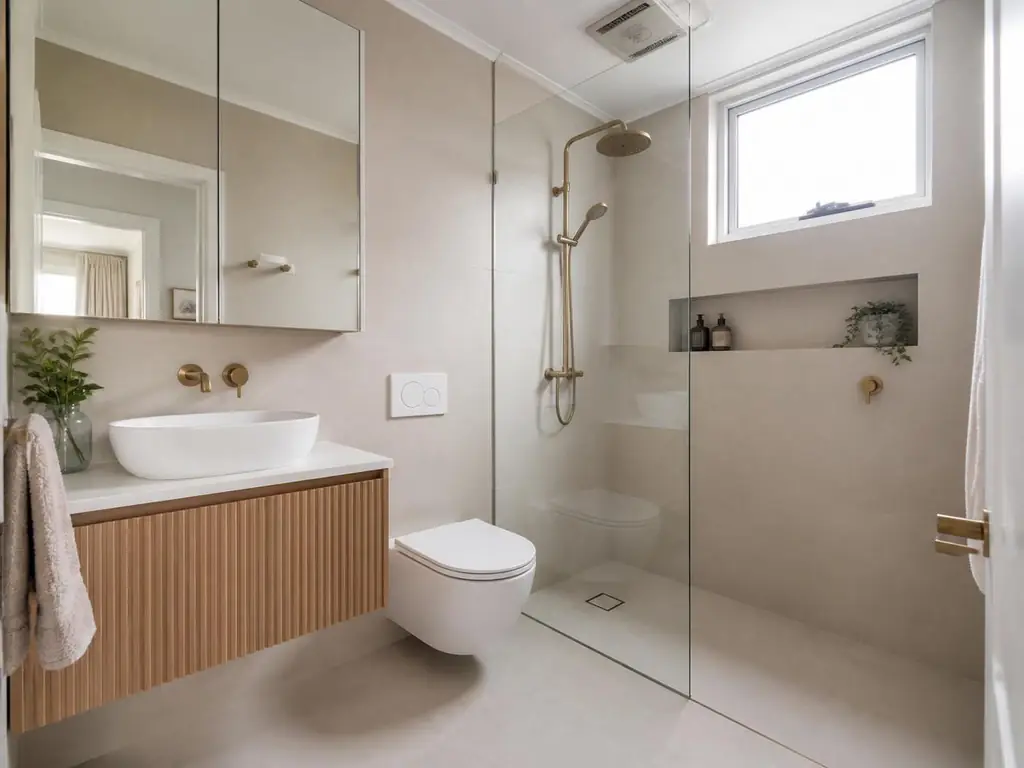
Where the room allows 1500-1800mm depth, running the shower the full width of the room with a single fixed glass panel (no return panel, no door) gives the most open feel of any small-room layout. It needs a floor waste roughly centred in the shower zone and a screed fall calculated from that point.
Go hobless: the single biggest space move
A level-entry, hobless shower removes the visual and physical step that divides a small room into two boxes. Instead of a 100-150mm high hob, the floor reads as one continuous plane from door to shower wall.
Structurally this needs a set-down: either the floor slab is dropped 20-30mm during construction, or in a renovation over an existing floor, a shower base tray or a build-up in screed creates the fall without a step. A linear drain set into the floor along one edge needs only a 10-15mm fall over a 900-1200mm run to clear water properly, compared with a centre point drain that needs falls running in from all four sides, which is harder to achieve invisibly in a small footprint.
Waterproofing to AS 3740 is non-negotiable here and actually gets more demanding in a hobless shower, not less - because there's no hob to contain a waterproofing failure, the membrane has to extend further up the walls (minimum 150mm above the finished floor level generally, and full height behind any niche) and right across the entire floor of the room, not just the shower recess.
Wall-hung fixtures buy back real floor space
Wall-hung fixtures aren't just a look - they physically remove mass from the floor plane and make cleaning easier, which matters in a room this size.
- Wall-hung vanity: seeing the floor continue underneath adds real depth and makes a 900mm-wide room feel wider than it is.
- Wall-hung WC with a concealed in-wall cistern: saves around 150-200mm of pan projection compared with a back-to-wall unit, and the cistern sits inside a false wall built from a 90mm or 120mm stud frame.
- Wall-mounted tapware and a wall-mounted mixer for the shower, rather than deck-mounted on the vanity or a shower niche shelf that eats into the recess.
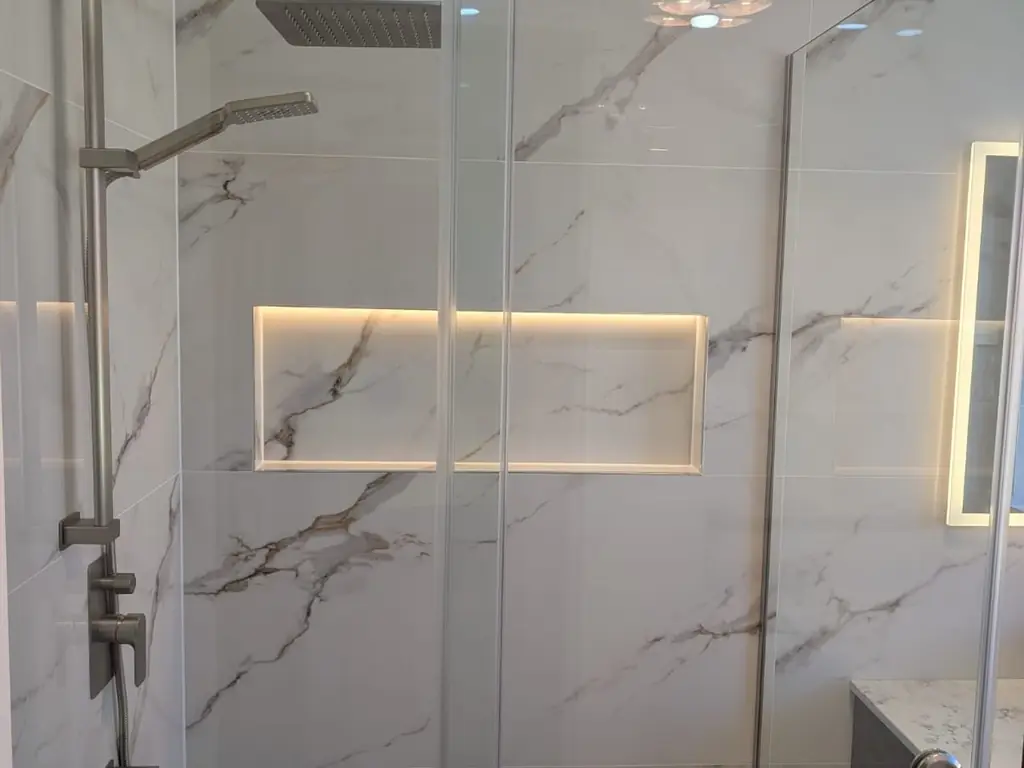
- A shower niche recessed into the stud cavity (300-600mm wide, set at roughly 1000-1200mm height) rather than a caddy or shelf that projects into the shower zone.
- floor space saved with a wall-hung WC vs back-to-wall
- 150-200mmfloor space saved with a wall-hung WC vs back-to-wall
- stud depth needed for an in-wall cistern frame
- 90-120mmstud depth needed for an in-wall cistern frame
Cavity sliders instead of hinged doors
A standard 820mm hinged bathroom door needs roughly 0.8-0.9m2 of clear swing space that's usually completely wasted - you can't put a bin, a shelf or a scale in it. In a 4.5m2 bathroom, that's close to 20% of your floor area doing nothing.
A cavity slider recesses the door into a stud-framed pocket in the adjoining wall. The cavity frame itself needs about 1650mm of wall length for an 820mm door (the door width plus the pocket), and roughly 90-92mm wall thickness for a standard single cavity unit - so it only works where there's a suitable stud wall (not masonry or a load-bearing wall without significant extra cost) on the latch side.
Where a cavity slider genuinely can't be retrofitted (masonry wall, no run of wall long enough), a sliding barn-style door on an external track is the next best option, though it does need wall space beside the opening to slide across.
Tile scale, grout lines and colour continuity
The old advice was 'small tiles for small rooms'. It's wrong. Large-format tiles (600x600mm or 600x1200mm) mean fewer grout lines, and fewer grout lines mean the eye reads a continuous surface rather than a busy grid.
Run the same tile on the floor and up the walls, or use a closely related tone, to erase the boundary between planes. Where the floor and wall are very different colours, the room visually stops at the skirting line and feels shorter than it is.
Match the grout colour closely to the tile rather than using a contrasting grout - a grey grout on a white 600x600mm tile creates a grid pattern almost as busy as a small mosaic tile would. Use a 1.5-2mm grout joint on rectified large-format tiles rather than the 3-4mm joint older tiles needed.
Vertical stack-bond tiling on one wall (rather than a horizontal running bond) draws the eye upward and adds perceived ceiling height. In a period home with a 2400mm ceiling, that's a genuinely useful illusion, not just decoration.
On the floor, check the slip rating - AS 4586 classifies wet-area floor tiles, and a small bathroom floor should be at minimum R10 (or a P-marked equivalent) to be compliant and genuinely safe, especially just outside a hobless shower where the floor stays wet.
| Tile size | Grout lines in 4m2 floor (approx) | Visual effect |
|---|---|---|
| 150 x 150mm | ~180 lineal metres | Busy grid, room reads smaller |
| 300 x 300mm | ~90 lineal metres | Moderate, still visible pattern |
| 600 x 600mm | ~45 lineal metres | Near-continuous plane |
| 600 x 1200mm | ~30 lineal metres | Most seamless, needs a flatter substrate |
Swipe the table to see all columns.
Glass, light and reflection
Clear frameless glass is the difference between a small bathroom and a small bathroom cut into two smaller boxes. Avoid frosted or reeded glass on the shower screen unless privacy from a shared space genuinely requires it - every extra visual barrier chops the room up further.
A single fixed panel of 10mm toughened glass, rather than a framed screen with a swinging door, keeps sightlines open and needs less floor clearance for opening.
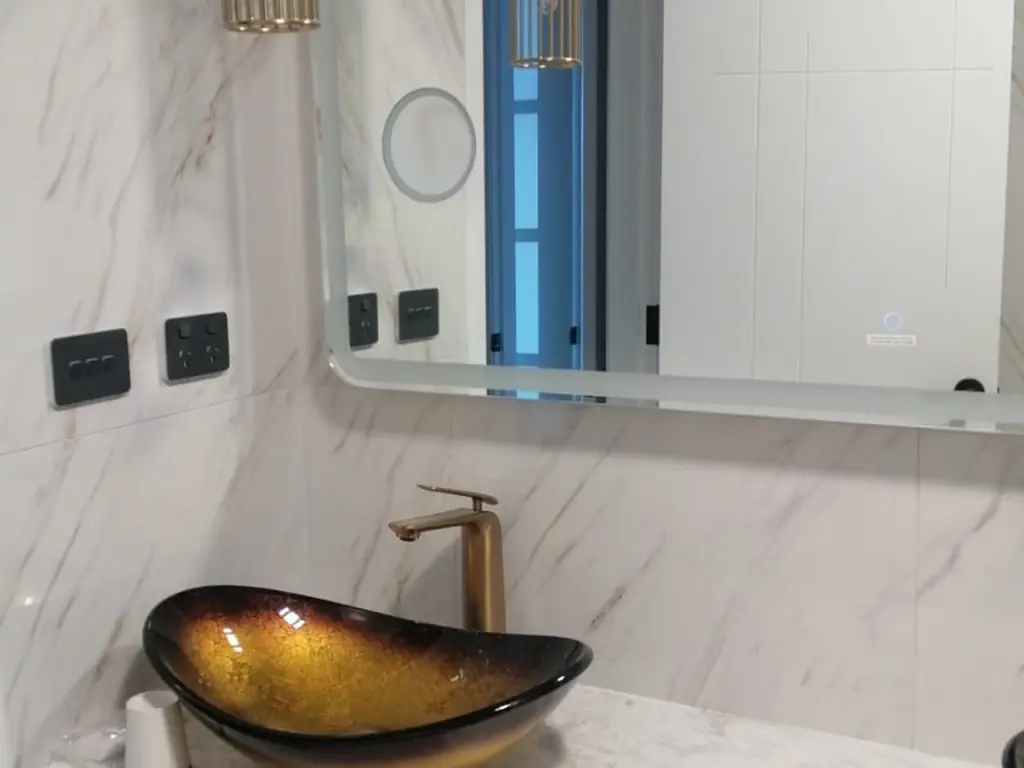
Oversize the mirror. A mirror that runs the full width of the vanity and up to around 1900mm high doubles the apparent volume of the room by reflecting the opposite wall and window. A backlit LED mirror does the same job and solves your task lighting (aim for a colour temperature around 4000K, which reads as neutral-white for grooming tasks) at once.
If the room has a window, don't block it with the shower screen. Where the only spare wall is the window wall, a clear-glass shower over a lowered sill still lets the light through and keeps the room's one natural light source working.
Storage in a room with no spare walls
Small bathrooms fail on storage more than on style. The fix is to use depth you already own - the 90mm of stud cavity in every internal wall - rather than adding freestanding units that eat floor area.
- Recessed shaving cabinet above the basin: full-depth storage with zero projection into the room, built into a standard 90mm stud cavity.
- Shower niche, 300-600mm wide, set at around 1000-1200mm and aligned to horizontal tile joints so it reads as intentional, not patched in.
- A shallow 150mm recessed shelf beside the toilet for spares and toiletries.
- Vanity drawers with a U-shaped cutout so they clear the basin waste trap and stay fully usable rather than being blocked by plumbing.
- A heated towel rail doubles as the towel storage you don't have cupboard space for, and helps dry the room faster between uses.
Ventilation matters more in a small room
A small bathroom generates the same steam volume as a large one into a fraction of the air. Under-ventilated small bathrooms are where we see the worst mould and the fastest paint and grout failure.
Specify a proper ducted exhaust fan rated for the room's air volume - as a rule of thumb, aim for at least 15 air changes per hour, which for a 4.5m2 bathroom with a 2400mm ceiling (about 10.8m3) means a fan rated around 160-190 L/s (roughly 10-11m3/min). Duct it to outside air through the shortest practical run, not into the roof cavity, and keep bends to a minimum since every 90-degree bend loses airflow efficiency.
Run the fan on a timer or humidity sensor so it keeps extracting for 15-20 minutes after the shower ends, not just while the light switch is on. In a small room with no window, this is the difference between a bathroom that dries out properly and one that's permanently damp behind the shower niche.
Colour and finish choices that read as spacious
Dark colours don't automatically make a small bathroom feel smaller - a dark, evenly-toned room with good lighting can feel enveloping rather than cramped. What definitely shrinks a room is high contrast: dark floor against light wall against dark joinery chops the space into pieces the eye has to separately process.
Pick one dominant tone and stay within a tight value range across floor, wall tile and joinery. If you want contrast, use it in a single accent - a black tapware finish or a feature niche tile - rather than across whole planes.
Matte finishes on joinery reduce visible fingerprints and glare in a small room lit by a single downlight, while a gloss or satin tile still bounces useful light around the room.
What a small bathroom renovation costs in Sydney
Small doesn't mean cheap. A 4m2 bathroom needs the same trades, the same waterproofing certification, the same electrician for IP-rated zones and the same fit-off labour as a 9m2 one - you simply buy less tile and less stone. If you're researching what this looks like in practice, our Bathroom Renovations Sydney page covers the full scope of what we deliver across the city.
Realistically, a full small bathroom renovation across the Hills District and Western Sydney runs $18,000 to $30,000 with quality fittings and fixtures kept close to their existing waste locations. Relocating the WC, discovering asbestos sheeting behind old tiles (still common in homes built before 1990), or moving into premium stone benchtops and tapware pushes it higher.
The saving in a small room comes from material quantity, not labour - which is why a $10,000-$12,000 quote for a full small bathroom rebuild should worry you rather than excite you. Ask what's excluded, and get it in a detailed written contract rather than a verbal estimate, with an itemised quote covering demolition, waterproofing, tiling, plumbing, electrical and fixed items separately.
- typical full small bathroom renovation, Sydney
- $18,000-$30,000typical full small bathroom renovation, Sydney
- typical on-site build time for a small bathroom
- 3-5 weekstypical on-site build time for a small bathroom
| Scope | Price range (AUD) | Notes |
|---|---|---|
| Cosmetic refresh, fixtures kept in place | $14,000-$18,000 | Re-tile, new vanity/WC, no waste relocation |
| Full renovation, standard finishes | $18,000-$24,000 | New waterproofing, screed, wall-hung fixtures |
| Full renovation, WC/shower relocated | $24,000-$32,000 | Slab cutting, new waste runs, premium tile |
| Full renovation, premium fixtures & stone | $30,000-$40,000+ | Stone benchtop, feature tile, custom joinery |
Swipe the table to see all columns.
Timeline for a small bathroom renovation
A straightforward small bathroom, fixtures kept in place, typically runs 3-4 weeks on site once demolition starts: about 3-4 days demolition and rough-in, 2-3 days waterproofing (including cure time - AS 3740 compliant membranes generally need at least 24-48 hours cure before flood testing and tiling), 5-7 days tiling, and the remainder for fit-off (vanity, WC, tapware, mirror, electrical) and a final inspection.
Relocating the WC or shower adds 1-2 weeks for slab cutting, new waste installation and reinstatement before waterproofing can even start. Add another 1-2 weeks of lead time before the build begins for material selection, ordering (particularly imported tile or a custom vanity), and council or strata approval where relevant.
- Week 1: demolition, rough-in plumbing and electrical, framing for niche/cavity slider.
- Week 2: waterproofing, flood test, screed and fall, start of tiling.
- Week 3: tiling completion, grouting, silicone joints cure.
- Week 4: fixture and fitting installation, cavity slider hardware, final plumbing and electrical fit-off, inspection.
Common mistakes we see in small bathroom renovations
Most small bathroom regrets come from decisions made to save a few hundred dollars that cost thousands in daily frustration.
- Choosing a framed shower screen because it's cheaper, then living with visible black or chrome framing that visually shrinks the shower recess.
- Skipping the exhaust fan upgrade because the old one 'still works' - most existing fans in older Hills District homes are rated well under the 15 air-changes-per-hour benchmark a renovated room needs.
- Fitting a standard-projection back-to-wall WC instead of wall-hung, and losing 150-200mm of clear floor space permanently.
- Choosing a contrasting grout colour on large-format tile, which recreates the busy-grid problem large tiles were meant to solve.
- Not confirming the cavity slider wall is free of plumbing and cabling before demolition, leading to a costly mid-project redesign.
- Accepting a verbal price instead of an itemised quote in a detailed written contract - in a small room, scope creep on 'unexpected' asbestos or waste relocation is common and needs to be priced in from the start.